How to Setup Google OAuth and Connect it to Auth0
- Rohit Jadhav
- Apr 3
- 2 min read

"Sign in with Google allows users to authenticate using their existing Google accounts, eliminating the need to create and manage new credentials."
In modern applications, users expect seamless login experiences — and “Continue with Google” has become a standard. Instead of managing passwords, applications can delegate authentication to Google using OAuth.
Google OAuth verifies user identity securely through a token-based flow, eliminating the need to handle sensitive credentials directly.
However, setting it up correctly involves handling redirects, client credentials, and token exchange.
In this guide, we’ll configure Google OAuth and integrate it with Auth0 to enable a smooth and secure login experience.
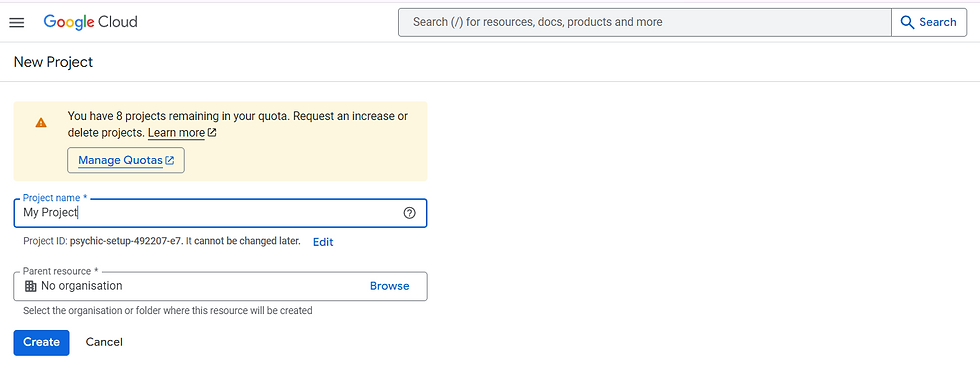
Step 1: Create a Project in a Google Cloud
Open Google Cloud Console
Click on Create or select a project → New Project
Enter a project name
Click Create
Step 2: Configure OAuth Consent Screen (First Time Only)
This step appears only if you are creating an OAuth client for the first time in the project
Google Cloud Console → Google Auth Platform
Click Get Started
Fill in the following details:
App Information
App Name
User Support Email
Audience
Select External
Contact Information
Developer Email
Finish
Accept the policy
Click Create
This screen defines what users see when they log in with Google. Google requires this before issuing OAuth credentials

Step 3: Create OAuth Client
Google Cloud Console → Google Auth Platform → Clients
Navigate to Google Auth Platform → Clients
Click Create Client
Configure Client
Application Type: Web Application
Name: Your app name
Authorised JavaScript origins: https://<your-auth0-domain>
Authorised redirect URIs: https://<your-auth0-domain>/login/callback

Step 4: Configure Google Social Login for Auth0
You can enable social authentication using Google.
Auth0 Dashboard → Authentication → Social → google-oauth2
Open the Auth0 Dashboard.
Navigate to Authentication → Social.
Select google-oauth2.
Add the following credentials:
Client ID
Client Secret
Scroll to the bottom of the page.
Enable Promote Connection to Domain Level.
Click Save.

With this setup, your application can now authenticate users using Google OAuth, providing a seamless login experience without requiring users to create new credentials.
By integrating Google OAuth with Auth0, you get the best of both worlds — a familiar login experience for users and a secure, managed authentication system for your application.
Thank you for reading this article, I really appreciate it. If you have any questions feel free to leave a comment.

Comments